User Creation
Overview
This section describes how you can easily create and manage users. Role-based access control (RBAC) ensures that only authorized users can interact with sensitive data, meeting security standards and aligning with business goals.
Prerequisites
- Email IDs required for creating users
- Basic understanding of roles and permissions
Expected Outcome
By the end of this guide, you will understand:
- User creation process
- Role assignment procedures
- User management capabilities
Creating Users
Basic Setup
- Navigate to User Listing page
- Click '+ New User' button
- Access the creation form
User Details Configuration
- First Name: Enter user's first name
- Last Name: Enter user's last name
- Email ID: Enter user's email address (unique identifier, cannot be changed later)
- User Roles: Select from dropdown list
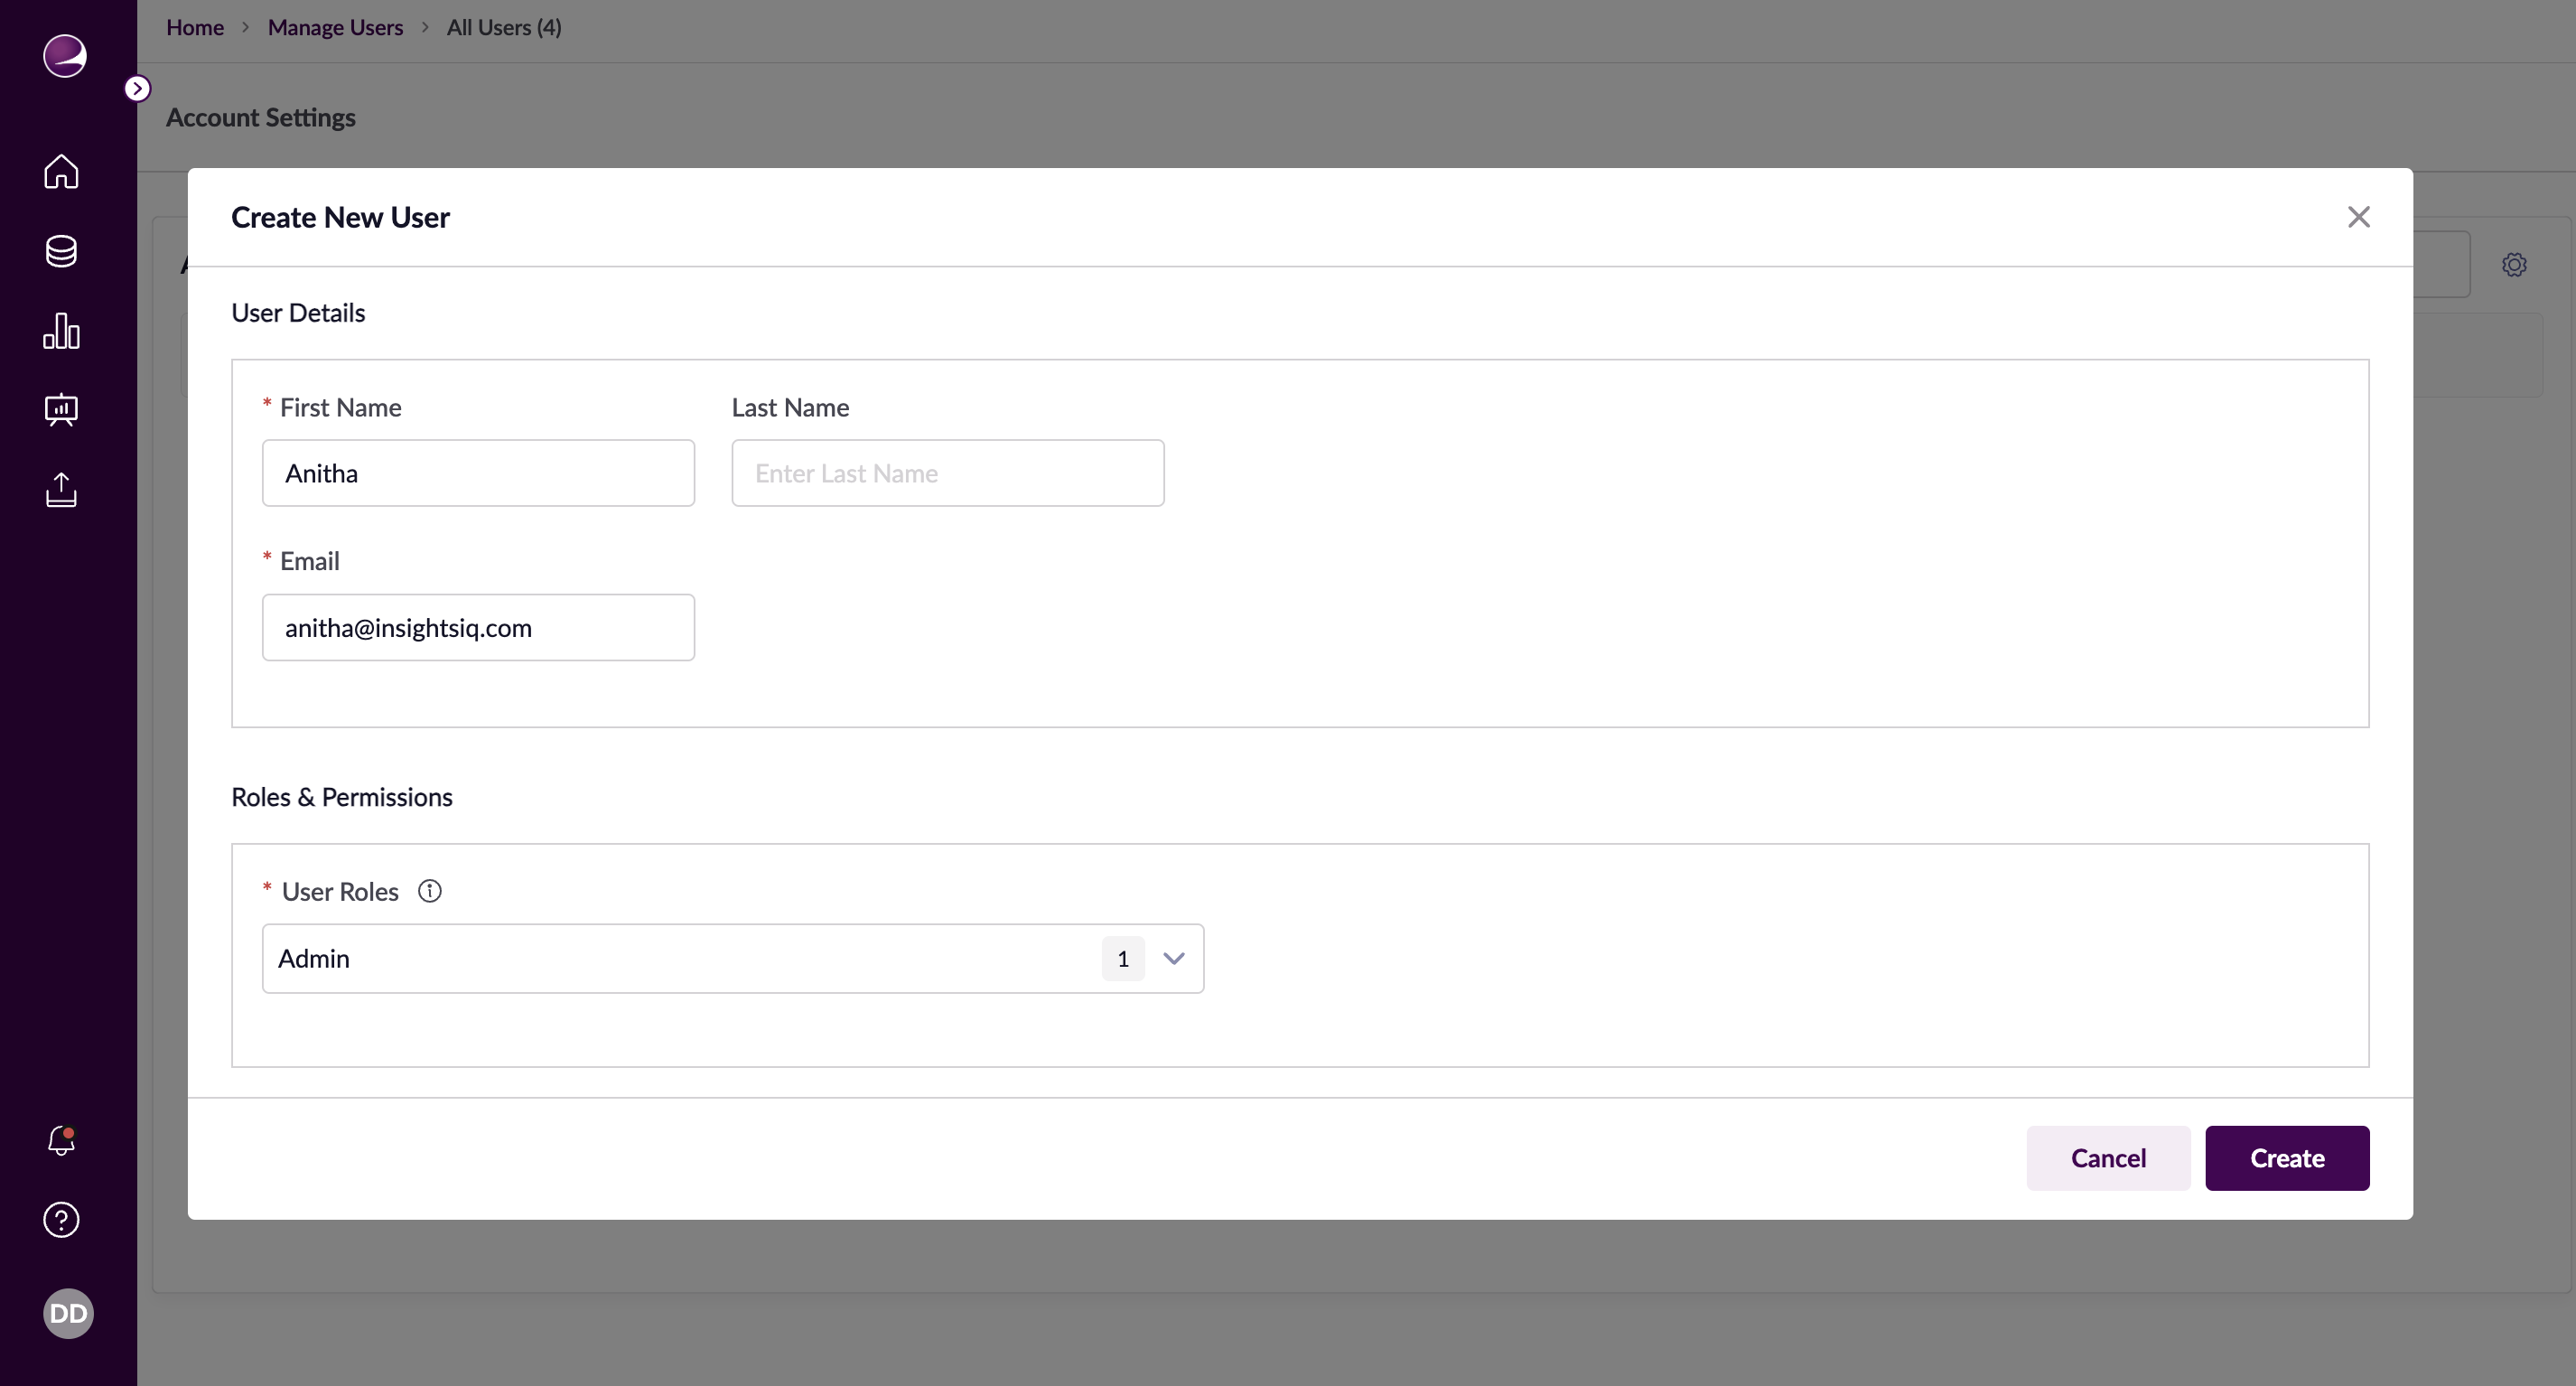
Actions Available
- Create: Save user and send activation email
- Cancel: Discard setup and return to listing
Managing Existing Users
Editing Users
- Locate user in User Listing
- Click Edit icon in Actions column
- Access edit form
Editable Fields
- First Name: Update as needed
- Last Name: Update as needed
- Email ID: Read-only field
- User Roles: Modify role assignments

Save Options
- Save: Apply changes (effective next login)
- Cancel: Exit without saving
Important Notes
- Email ID serves as unique identifier
- Changes take effect after user's next login
- Manual refresh required for immediate changes
- Activation emails sent automatically